The ArcGIS Conversion Toolbox An overview of the Conversion toolbox is a dedicated suite of tools designed to streamline conversion process. It offers a comprehensive array of options for transforming data between different formats, ensuring efficient and accurate conversions.
Table of Contents
Understanding Common File Formats
Before diving into conversions, it’s essential to grasp the basics:
- Vector Data: Represents spatial features with points, lines, and polygons (e.g., Shapefiles, Geodatabases).
- Raster Data: Represents data as a grid of cells with assigned values (e.g., TIFF, JPEG, DEM).
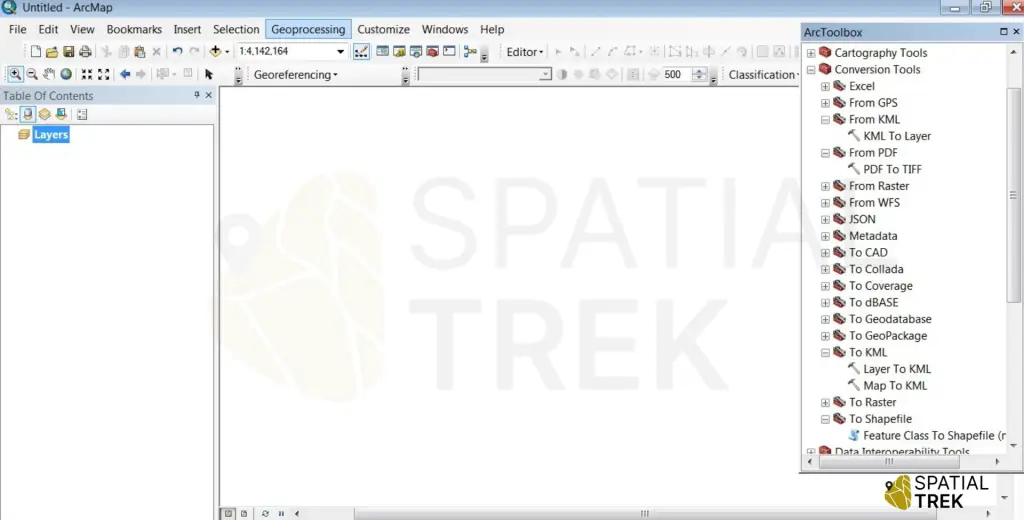
Locate the Conversion Tools:
Within ArcToolbox, expand the “Conversion Tools” section. This houses a variety of toolboxes designed for different file format conversions.
KML to Shapefile
- Why Convert: KML (Keyhole Markup Language) is often used for GPS data or Google Earth layers, while Shapefiles are more versatile for GIS analysis.
- Steps:
- Import the KML file into ArcMap.
- Right-click the KML layer in the Table of Contents and choose “Data” -> “Export” -> Select “Shapefile” & other option is from toolbox > conversion toolbox > from kml > kml to layer > ok
- Select the output file’s location and name, click ok
- Click “OK” to initiate the conversion.

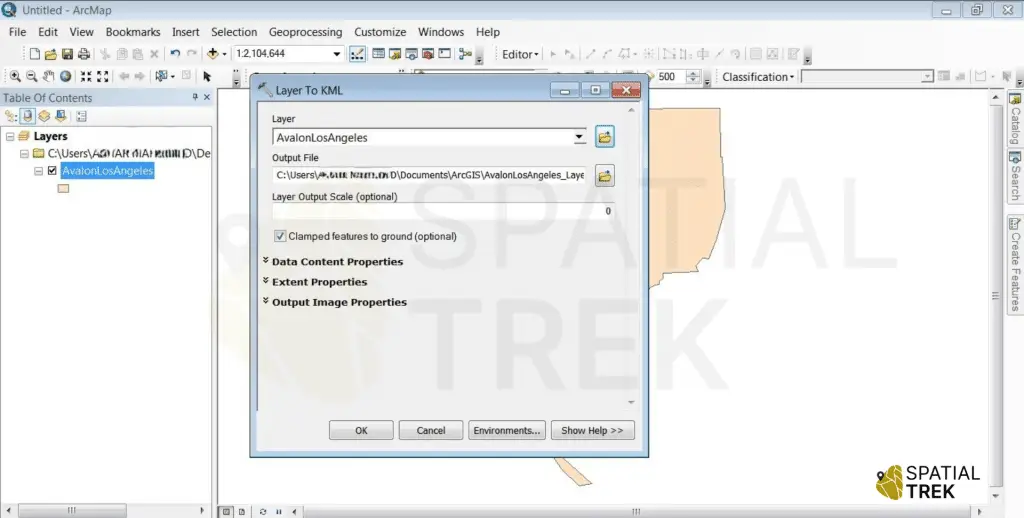
Shapefile to KML/KMZ
- Steps:
- Access Shapefile: Load your desired Shapefile into the ArcMap interface.
- Open Conversion Tool: Navigate to ArcToolbox > Conversion Tools > To KML.
- Run Conversion: Select the input Shapefile, specify the output KML location, and click “OK.”
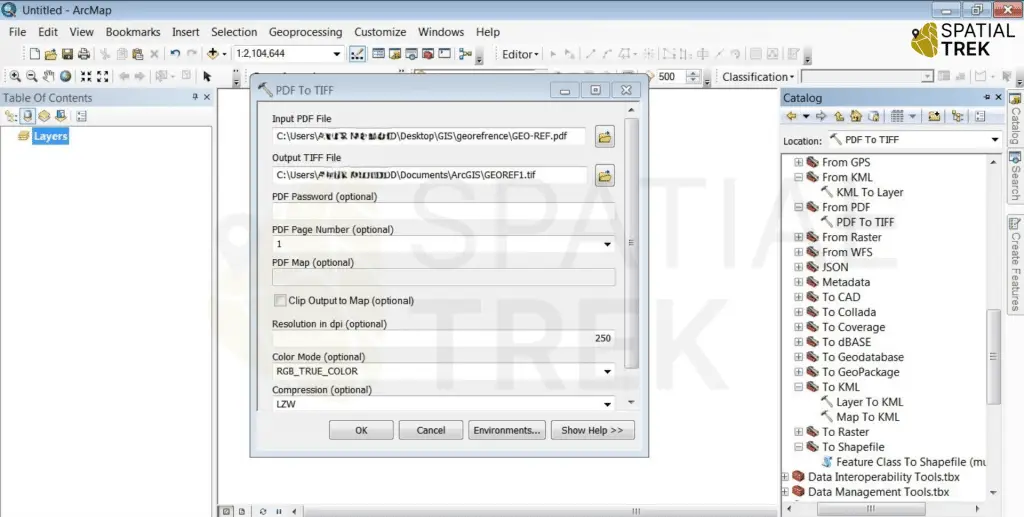
PDF to Raster
- Steps:
- Launch ArcGIS and add input file.
- Open catalog >Arc toolbox > conversion toolbox > from pdf > pdf to tiff > ok
- Select the output tiff file’s location & pdf page numbers > click ok
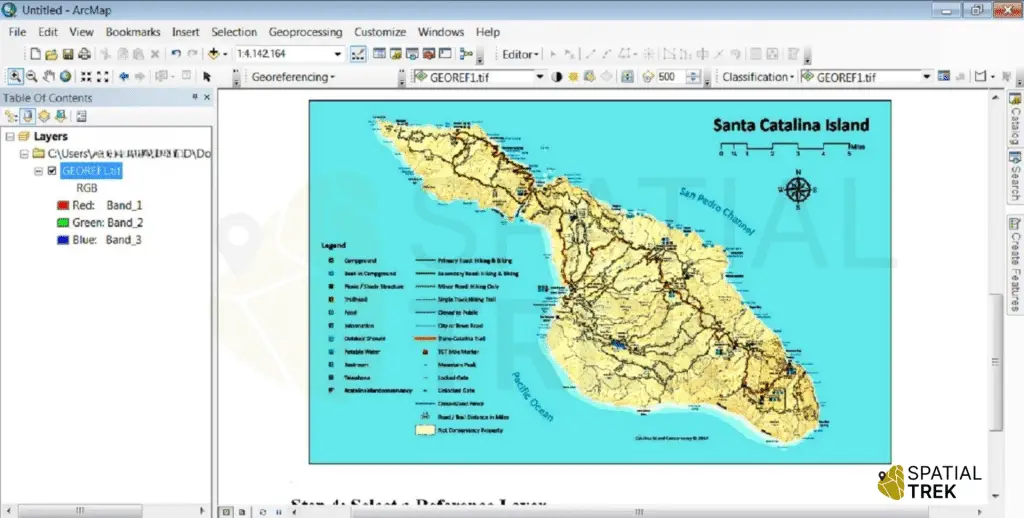
here shown the output, that converted from pdf to raster.
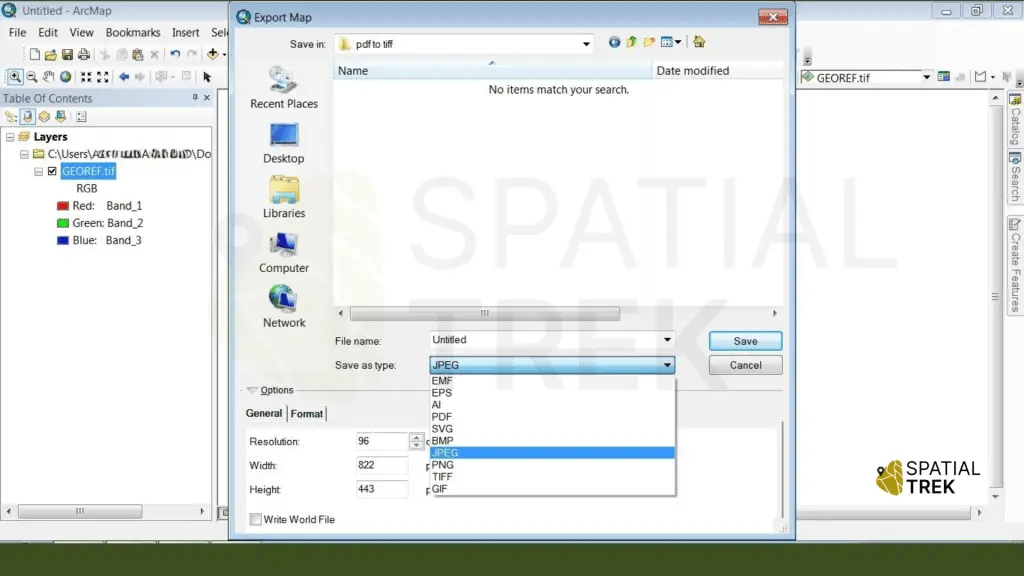
Raster to JPEG
- Steps:
- Launch ArcGIS and add the shape file to your map.
- Click on file from file menu > export map > output file name > save as type click > select JPEG
- Select the output file’s location > input name > click ok
Shapefile to Geodatabase
- Why Convert: Geodatabases offer better data management and organization.
- Steps:
- Create a new geodatabase in ArcCatalog.
- Right-click the geodatabase and choose “Import”.
- Select the Shapefile(s) you want to import.
- Choose the desired feature class type (point, line, or polygon) and click “OK”.
Raster to Shapefile (Vectorization)
- Why Convert: Converting raster data to vector format can be useful for analysis or overlay operations.
- Steps:
- Use the “Raster to Polygon” tool in ArcToolbox to convert raster data to polygons.
- Consider using the “Simplify Polygon” tool to reduce the number of vertices for better performance.
Other Common Conversions
- DWG to Shapefile: Use the “CAD to Geodatabase” tool in ArcToolbox to convert AutoCAD drawings.
- CSV to Point Shapefile: Create a point shapefile from tabular data with X and Y coordinates using the “XY Data” tool.
By understanding the capabilities of the Conversion Toolbox and following best practices, you can efficiently manage your geospatial data and unlock its full potential. Remember to consider data formats, coordinate systems, and data quality when performing conversions.